Hi! Have you ever wondered what the heck you could do with all those old CDs so many of us have cluttering up our spaces? One day I was doing some cleaning (Shocking!) and thought there has to be something to do with these silver discs....
Here is a video of how I transformed some writable CDs from the old days into some nifty little embellishments. Check it out.
I tried doing this with different types of CDs but only had success with the writable type.
Hope you are inspired to get crafty! Thanks for stopping by.
Welcome, to our *Holiday Pillow Party! Feast your eyes on some pretty pillows and enter our contest for a chance to win! I look forward to resting on this pillow when we will be watching movies this holiday season. When I saw this Cricut "Meowy Christmas" Iron-On design, I knew this would be purrfect for the Fairfield Poly-fil® Ultra Plush Pillow pillow party contest.
Supplies Used:
(Affiliate links provided for your shopping convenience only. Click on Highlighted words to purchase. Note, I receive a small commission for any purchases. Thank you.)
Welcome to How To Organize your Stickers in part 3 of How To Organize Your Craft Supplies.
Stickers are so loved by a lot of crafters, children, and a lot of teachers. They are an easy way to decorate by or add just a touch of a little something to just about anything. My own love of stickers began back in elementary school were getting a label from the taught on work well done was a badge of honour and mostly bragging rights! In those days stickers were expensive and hard to come by in our little town, so receiving any was a treasured gift!
Fast forward to today, and we can find and purchase stickers inexpensively at just about every department, discount, and dollar stores (Dollar Tree ). Plus they are available in just nearly every theme one can imagine. As an adult and avid crafter, I collect more stickers than I need or can possibly use up in my life probably. I just keep coming up with great excuses to keep receiving them. Craft stickers are useful to decorate a letter, package, or card and make it go from looking humble to spectacular. The infatuation with collecting all of these self-adhering small paper images also means that I need to have a place and a method to store them. So I will use them.
Early on, I began storing my precious in bins, plastic envelopes, anything that would contain them. As the collection grew, so did my need to develop a system. It began as a series of plastic page protectors and some binders and evolved into what I currently use.
Years ago, when scrapbooking was the "in" craft, manufacturers made and sold tools to store our beautiful stickers, which is where I invested in specialty sticker storage binders with plastic pages with multiple pockets. Initially, I only needed one binder but as you can see in the pictures below and in the video linked here, that obviously changed. Each storage binder was purchased as my budget allowed.
The storage binders I use, unfortunately, do not seem to be sold anymore. However, I did some research and found the Big Fat Flippin’ Storage Binder. Gotta love the name! Another fun system I came across is theAdvantus Cropper Hopper Projections Expandable Sticker Stadium, 13.375 by 11.25-Inch, Expands to 8-Inch which is more of a desktop type of storage.
The method I have found to work best for me is to use a series of binders and a variety of plastic pages with and without pockets. I have repurposed some 12 x 12-inch scrapbook albums some old student binders, and of course the storage you see in the picture.
What I learned from using the commercially sold system is that the binders are so easy to stack or lay on a shelf and also they ate very portable. Ther are a variety of plastic page protectors still available in the market, and not all are sold with the intention of sticker storage. One simply needs to look at what current;y exists for other uses and adapt them to be used for craft supply and individually: stickers! One thing I do is modify plastic page protectors to suit my storage needs and binders. In the post about Stamp organization, I talk about how I created pages with pockets for the stamps.
I use the same method for stickers. (link video)
Another thing that is successful in my studio is the fact that I tend to maximize the use of the allocated space I have and whatever is overflow is stored off-site. See more about "M.I.S" in the video. I like to organize my stickers similarly as the stamps, with several categories.
The categories I use are:
Animals, Birds, Insects, Wildlife, Fishing
Bubbles, Borders, Chalkboard, Leatherette, Decorative, Food, Family
Fall: Back To School, Thanksgiving, Halloween, Football, Basketball, Cheerleading, Bowling
Spring / Summer: Easter, Cinco DeMayo, Gardening, Victoria, Mothers, and Fathers Day, Canada Day, July 4th, Labour Day, Golf, Soccer, Volleyball, Tennis, Travel, Home Renovation
All the Letter and Number Stickers are stored in a large portable former scrapbook storage bin in individual files separated by colour families. Note not shown
in the video.
Currently available in the market today:
My intention is to inspire you to look at your own collection and see if an organization and storage system like this one or something completely different would be of benefit to you. I look forward to reading your comments, feedback and your ideas. Thanks so much for stopping by.
Are you the proud owner of rubber, cling, or clear stamps and metal dies for crafting? Do you feel overwhelmed by the size of your collection? Or, are you someone who likes to organize? Maybe you are just interested in craft rooms and all the stuff that we makers like to collect. Then This article may be helpful to you.
There is a series of videos that accompany these posts if you are interested. Note that I will have links below that are affiliate links that pay me a small commission for any paid purchases from viewers, so if you do buy something (and please don't feel like you have to) then thank you for helping support this blog and my youtube channel: Annmakes.
Ok, so here is the deal. I am a crazily addicted crafter that has gone from being a hobby crafter to a professional and now an influencer in the Crafts and Arts Industry. Yes, there is such a thing! I love what I do, my work is my hobby, and my hobby is my work. The lines have become utterly blurred! LOL.
Now that you know this information about me, you may understand why it is that I own so much stuff and that I felt the need to create an organizational system to keep track of everything I have so I could have more time for doing what I love. Which is to make stuff, design things to be made, teach about how to make stuff, and of course, buy and buy supplies to make things.
I do not know just how many stamps I own, but I know it is a lot! Over the years, I have tried different systems to store and organize my stamps. Each system worked for some time, but as my collection grew, and my lack of commitment to keeping track led me to eventually creating the current system I have.
The first thing I did was to gather ALL of my stamps, and I mean ALL of them! I had my stamps spread out all over the place before I realized I needed a system before I made a SYSTEM! So I gathered all my stamps by the type of material they are (clear, rubber, foam, etc.) and created several areas where to place them temporarily, every kind of stamp in its own space.
I had already been keeping my stamps in basic categories such as Christmas, and Other Holidays, but I knew I needed to do more. So I began by thinking of groups in which I would think of looking for and using stamps. That is how I came up with 22 categories. My mind works in a certain way, and these categories just make sense to me, as they may not be relevant to you! Here is the list of all the types I store and organize my stamps.
13. Winged Creatures
14. Creativity
15. Stamps with Dies
16. Micro, Washi, Other
17. Sports
18. Homemade
19. Planner
20. Christmas
21. Easter
22. Halloween
Once I had the category names figured out I needed to consider just how to store my stamps in a way that would be practical for me, and save space. My current studio is smaller than the place I used to have all my tools, supplies, and did make all the projects. I need to be efficient as space is at a premium. I also want to keep all of my stamps in one are, as this follows my mantra of keeping Like with Like! (See blog post link here and video link here). To save space and keep the tools that I use regularly, I decided to separate the extensive seasonal collections of stamps that only get used at certain times of the year, such as the Christmas, Halloween, and a modest selection of Easter Stamps. The season stamps are stored in an off-site location, and I pull them out and bring them into my current creative space when they are needed for projects.
The next step was to create a system, I store the different types of materials the stamps are made of, as they require different storage needs. First, there are what I call "Flat" stamps, which is anything that is a polymer, flat rubber unmounted and cling stamps, and foam stamps. The best storage I came up with was a flat system that could be stored like files. I chose to create pockets in plastic page protectors.
With a cardstock, backing to hold multiple sets of stamps, and cardboard file/magazine boxes to keep them. My goal was to fit all of my stamps into a specific set of cupboards by my paper crafting area in the craft room.
To make these pockets, I took all of my "flat stamps" (which had been divided into the 22 categories) and laid them out on my dining room table, one group at a time. I took each set of stamp and removed any packaging and labelled each stamp or stamp set with the information I need to have. The information I need for my work is the Name of the Stamp, the category, the brand, the product number, the type, and how many pieces are in a set. Another vital piece of information is if that stamp set is part of a collection or if there are accompanying, stencils die, etc.
Once all the extra packaging was removed, I literally was able to save about 25% of the space, just by removing the bulk. I also made transparent plastic backing sheets (if none came with a set) to size for each stamp or set to cling on to (an alternative I found is to use DollarTree Kitchen Chopping Mats).
I even cut down any extra plastic that came in some sets. Having this plastic made it easier for the stamps to cling to something and to store them safely. Next, I placed the stamp sets on sheets of thin cardstock that are 8.5 x 11 (that fit inside the plastic page protectors) I moved everything around to fit as many stamps onto as few layers as possible, on both sides! I drew lines around each set with a pen and ruler, placed the papers back into the page protectors and using a sewing machine I sewed through the plastic and paper following along the drawn lines. After, I cut open the pockets below each stitched line very carefully with precision scissors.
I sewed and sewed for days. At a later date when I found myself needing some extra pockets, and I had put away the sewing machine I experimented with creating the same pockets but by trying to use double-sided adhesive and even glue to glue the plastic to the cardstock. That worked a bit, I found that using extra tape made for sturdier pockets. Each set of stamps in the pockets I made were also labelled with strips of washi tape that corresponds to each category, for faster visual recognition. And a label with the category name.
The thicker stamps such as the wood mounted ones are mostly stored inside of shallow plastic clear boxes from Stampendous. I like these because of how they fit perfectly on the shelves inside the cupboards in my studio that are basically regular kitchen style cabinets. I can store a lot of stamps in each box, and several boxes standing up or laying down and stacked on a shelf. It is incredible how much space I have saved by converting to this system. Formerly all the stamps used to be stored in at least 6 multi drawer storage drawers on casters by Sterlite., plus several shoe boxes in a closet.
The side of each Stampendousthicker box is labelled with the name of the category and a piece of decorative tape that is attributed to it for easier visual recognition. I use a label maker (link) for making the very legible labels! If there is more than one box worth of stamps in a category, I number them on the side and write the corresponding number in the catalogue along with a picture of the stamps and all of its information. I like to use these .75 inch round labels.
Note that I also have some stamps left in two drawers that are waiting to be moved into the new Stampendousthicker boxes, but are currently labelled in the same fashion. It necessarily does not matter what the stamps I store in but how to be able to locate them.
As for the metal dies, I store these in a similar yet very different manner. The similarity is that I do label each die and die set and make a sample that is added into the Tools catalogue in the Die section, or the Die with Stamp section. My current and favourite way to store all the metal and other dies I own is to keep them close by my desk where I do most the paper crafting and easily found without a lot of searching.
The thin metal dies are kept in poly envelopes that I either created or that I already had on hand, with DollarTree magnetic sheets, and they are put inside some open photo type boxes to keep them upright inside the drawer. To make each pocket, my preferred method is to repurpose the plastic packaging that comes with the DollarTreemagnetic sheets I buy. I especially like to use these magnetic sheets that I buy from DollarTree. I do all of this just to make it easier and quicker to locate any.
die.
I will cut one end of the plastic, pull out the magnetic layer and cut it down to the size of the box I use to store in. Next, I cut down the sides of the plastic pocket, cut off one of the flaps then I score and fold the other flap to create an envelope that I can slide the DollarTreemagnetic sheet that I adhere to the printed side of the cardboard that was also part of the packaging. Finally, I create a label using a label maker (link) which includes the name, brand, and item number of the die. Plus because I work as a Cricut Influencer, I add a piece of green decorative tape to the sheets that hold any Cricut(Cuttle Bug) brand dies.
For the dies that have matching stamps, I use the same system plus I include the stamp set (transparent polymer) in the same pocket behind the die set. I also make sure to include information about the number of stamps that are part of the collection.
The thicker dies are stored standing with their respective labels showing on the top and filed into the same drawer in their own area.
Again there is a sample of each die included in the catalogue with its pertinent information.
Finally, I have a collection of old Cricut Cuttlebug dies (no longer available) that I still like to use. These are stored standing up in some clear bins. I cut a piece of the original packaging to the width of the die and slightly taller that includes the information about each die.
Any other die and die sets I own that came with their storage system are also stored together in their own are in that drawer. It is a substantial and deep drawer! The kitchen cabinets come from Home Depot and have pull-out drawers inside.
We have come to the end of the post, and I am so appreciative for the time you have taken to read it all! It would be great if you left any comments (mainly positive, lol) down below beside that little pencil icon. Also if you have any questions, suggestions, and any tips please leave those in the comment section below. Thank you again for stopping by. Stay Crafty!
Welcome to How To Organize Your Craft Supplies. If you are reading this, I assume it is because you are interested in one main thing! I bet it's that you want to be able to craft more within the limited time you have. Maybe you are trying to spend less time looking for your supplies and would prefer to spend more time actually making crafts. As we cannot alter the time, it seems to be the one thing that we can not control, and it is the most in-demand. Of course, there is also the money issue, but that's for another post. LOL Note that there are affiliate links throughout the article that are intended to be helpful, if you do purchase after clicking those links I do receive a small commission, thank you.
The first step I recommend is to assess the space you have to craft in. Every area will have the limitations of its size no matter how big or small. By the way, bigger is not always better.
What are the limitations you have? Can you work in the same room as where you store the majority of your materials and tools? Or do you need to make do and think portability? Do you have an alternative storage area(s)? Consider how you work, and what you like to make. For example, are you primarily a paper crafter? A painter? Sculptor? Sewist? Perhaps like me, you want to dabble in everything!
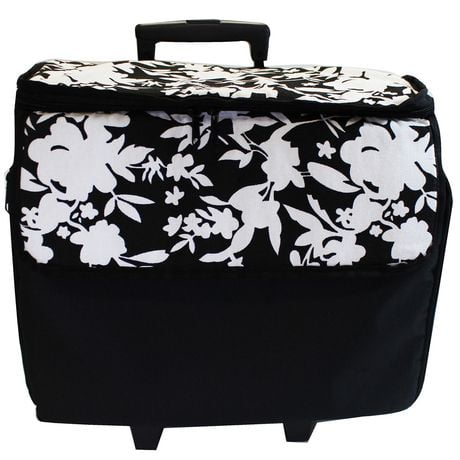
If you have to store your materials in one location and be a portable maker, for example, you travel to crops regularly. Or you tend to craft at the kitchen table whenever it is not being used by the family. Then you need to store your materials in a spare closet, dresser, or under the bed! You might need a mobile and portable storage like the Unique Creative Fold Out Sew & Craft Tote Black. Think totes with wheels, carts, bins with handles etc. Keep your most-used tools together in portable tool kits. Think like the carpenter who travels with her tools from job to job. I have seen some use something like the Hyper Tough Mobile Tool Box Black/Hyper Tough Red. By the way, you may want to own some of the same tremendous and sturdy storage from hardware stores and big-box stores. Sometimes the mobile tool storage units marketed to the home building industry is less expensive than that which is sold to the Craft Industry. Check out something like this: Black + Decker Black & Decker Jr. Rolling Storage Case It might not be as pretty or pink, but it is usually very spacious and sturdy!
Pretty tote seen on Walmart.ca.
I have both portable and stay in place needs. So I actually have doubles of specific tools in totes packed and always ready to go.
For the Stay, in place, crafter here are my recommendations.
#1. Assess your space
#2. What do you make and How do you work
#3. Like with Like
#4. A place for everything and everything in its place
#5. M.I.S = More in Storage System
Assess your space. Take a look and take measurements if need be of the area you will be working in. Maybe you are fortunate enough to have an entire dedicated area or even an entire building for your crafting! Perhaps you have a closet that you can convert. No matter how big or small that space is you will benefit from taking the time beforehand to assess just how much space there is and how you can best utilize that area. Remember to look up and don't forget to look at the vertical space too. So much can be done to a bare wall! Wall space is great for shelves, pegboards like the Azar Displays 900945-WHT Pegboard Room Organizer, White Pegboard and hooks.
What Do You Make, and How Do You Work. Knowing ahead of time what crafts you are interested in will also help in your assessment of how to best use that expensive area! Remember to also consider how you will work on your masterpieces in this space. Are you the type of crafter who prefers to stand, sit in a chair. Are you comfortable on a bar height stool and working off a counter, or a wood easel? Answering all of these questions, in the beginning, will not only help in how you will set up your making room but it will also help to know precisely what you may need to buy, upcycle or find from around your home. Save your money for the enjoyable stuff like supplies!
One of my two favourite mantras is: Like with Like. That means I like to keep the tools I need for the activity they are intended for together. Just like in my kitchen, I keep the bowls, measuring cups, rolling pins etc. in the same are in my kitchen as these are my tools for baking. In my studio, I keep all my paintbrushes close to where I have my easel and paints.
A Place for Everything and Everything in its Place is my second most used sayings! My family hears this one very often! My goal for this is that by living with others and sharing in the tools and supplies to run our household, it makes a big difference to the person who needs to use let's say the scissors, to be able to find the scissors where they are intended to be kept when not in use! To me, it's a simple system. I apply the same logic in my studio, even though most of the time, I am the only person crafting there. I still find myself to be more productive when I can just grab whichever pliers, rulers, or paintbrush I want to use if I always put these items back where they are supposed to be kept when not in use!
Finally, there is my M.I.S system, which I coined and refers to More In Storage. The More In Storage System I created for my own pleasure was born out of the need for me to keep only a limited amount of consumable supplies with my immediate working area to be used almost daily while maintaining a right amount of extra supplies on hand but stored in a different city. Having this system allows me to have a greater variety of supplies within my current studio space, without feeling overcrowded with all my tools, and ALL my supplies in one room. For, if I were to store everything I own for my crafting, I would not have any space left over to actually work in.
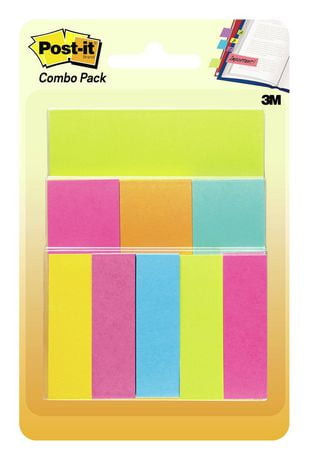
So, how does this M.I.S system work? Let's say that I buy 3 packs of 12 x 12 Black cardstock because I know I used this supply a lot, but I also have an opportunity to purchase a larger quantity making each sheet much less expensive because of the buying in bulk. What I do is I chose to keep perhaps one package in my studio. I will add a 3M Canada Assorted Pastel 3X3 Size Sticky Notes Assorted Sizes note write the letters M.I.S and attach that to the parcel or maybe to the last sheet of paper I am keeping in my studio. Next, I will add a sticky note to each of the other 2 packages and write a plus(+) sign which I know means that these are extras. I will take the extra 2 packs and store than in my alternative storage are. In my case, that's my basement where I have plastic Sterilite 85L Storage Box- White- 4Pk White storage bins just for my extra supplies. By the way, those bins are labelled as to what their content is.
Keeping track of what you have is also an essential component of having an efficient organization system. Such a system need not be complicated, however at least having an idea of what one owns does enable the maker to save money, time, and space.
By keeping an inventory of what already exists in the crafter's space and in the alternative storage the crafter can safely go shopping and spend her hard-earned money only on tools and supplies that she does not already own and that will be a positive addition to craft tool kit!
There are many ways one can keep track of their items. Some prefer to go the digital route and keep track of their collections with apps such as Evernote or even have spreadsheets. If that works for you, then go right ahead and do just that. Maybe you prefer to have a written list of what you own. Whatever makes you most comfortable is the way to go. Another way some crafters keep an inventory is through pictures that they continue on their smartphones, All of these are large systems that can all easily be adapted to suit the crafter's preferences and needs.
Currently, I use what I like to call my Catalog system.
The Catalogue System I created is simply made of several Hilroy Ultra Heavy Duty Binders, 1", 11-1/2 X 10-3/4 with tons of Pen+Gear Sheet Protectors, and dividers. Being a visual and tactile type of learner, this system is what appeals to me the most. My tracking system is made of 3 binders plus a stack of paint swatches.
The most massive catalogue is the Stamp Catalog that holds images and details about my entire stamp collection. It includes the rubber and wood mounted, clear acrylic, cling, foam, and handmade stamps. I have an extensive selection, so having 22 categories makes sense to me!
Secondly, I have a Tool Catalog, which includes everything I consider to be a tool and only need to have one of each. It is not the same as a consumable supply. There are 6 sections.
1. Stencils (note this may be moved to a separate binder)
2. Dies
3. Dies With Stamps
4. Punches
5. Embossing Folders
6. Brass Stencils, Rubbing Plates
The third binder is the Catalog of Colours. In that, I keep track of swatches, and samples of all of my consumable types of tools/supplies that create colour. There are 9 categories, and I may add more in the future.
Finally, there are the paint swatch charts that I keep in thick plastic pockets. These prove to be very useful during painting sessions, especially when I want to match paints in their true colours.
I hope that you are inspired to create your very own organization system, and find more time to craft.
please, return for future posts in this series and see in detail how I use my systems in my own space over on Youtube.
What happens when 24 Craft and Food Bloggers go to a conference for two days to learn about being the best Bloggers? A lot of new friendships are made, and existing ones just create a stronger bond! You'd think in this dog eat dog, competitive world that the opposite might happen, but not with us, it seems that we believe that collaboration is way more profitable.
So, I went to the Prime Blogger Conference held in Chicago last week, the first ever. I have to say this was an event not to be missed and if they do it again I highly recommend it if you are a serious blogger and professional crafter or foodie! The conference fee was well worth every cent. I got so much out of that investment, more so than other conferences I have attended. Plus, the food and the SWAG was AMAZING! But did I mention how great this group of bloggers is? Hello! If you ever wanted to be in a room filled with talent, this was it!
Below I have a video for you highlighting all the crafty goodness I brought back that will be used in future projects I will share with you!