It's no secret that I LOVE Cricut®! It all started way back in 2005-2006(?), and I heard about this fantastic electronic die cutting machine named after a green bug! Being the creative and curious, type by nature, and intrigued, I just had to know more! Then, IT arrived in Canada! Armed with every penny, I had scraped up and a credit card I made sure my kids were looked after and drove out to a store in the other province early one morning before the store opened so I could be one of the first to buy one of these Cricut™s in my country. The rest is history.
First. Let me explain what a Cricut™ is and if you are not familiar with what Cricut™ is let me explain with this. Talking about the most current version of the Cricut™ available in the market today, the Cricut Maker™!

The Cricut Maker™ is #1, the "Ultimate" machine out there known for it's cutting performance and versatility. #2, No, other product out there compares. #3, With the myriad of blades available and its #4, Adaptive Tool System™ it performs at a professional level, #5, is expandable, and if using the Fast Mode will cut and write up to twice as fast!
Reason #6, Use the Cricut Maker™ to make the most out of your creative time to cut the most extensive selection of materials from delicate fabrics to matboards, and even leather! #7, Combine the machine's capacities with the more than 500 digital sewing patterns available to make sewing and quilting projects come to life quickly. #8, Or enjoy its Bluetooth® wireless technology to create beautiful paper crafts from the comfort of any room while the Cricut Maker™ does the job in another area!
I 've rambled on about eight reasons alone to love the Cricut Maker™, but what are the other reasons for me to still Love Cricut? More importantly, how do I organize ALL my Cricut Stuff?
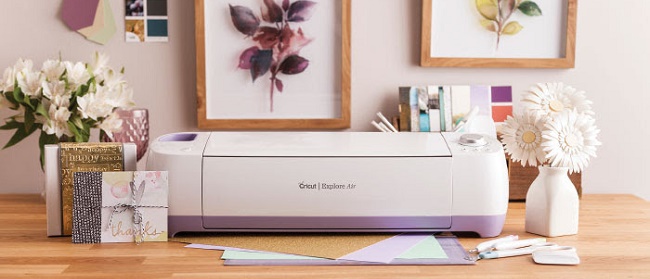
Another five reasons I love Cricut® is ALL The PRODUCTS and TOOLS! To be honest, I probably own the majority of what Cricut makes, as I like them so much. I have told you about the Cricut Maker™ which I own (Thanks to Cricut), I also still own the Explore Air™ 2 (still available),

and the Cuttlebug™.

It doesn't end there I am happy to say that I have and enjoy the Cricut Easy Press™ too! Fifthly, I get to store and carry my prized equipment in the gorgeous Tote collection by Cricut®!
Which now brings me to talk about Those 10 Cute Ways To Store and Organize My Cricut® Stuff! My motto is A place for everything, and everything in its place!
1. Drawers, Shelves, Protective Pouches, and Labels. I currently store my Cricut Easy Press™ in its own drawer in my studio. I also use a wheeled storage cart when I am using the Easy Press™ and need a little extra working space.

2. Bins, Boxes, and Baskets. All my Felts are stored in one of these bright pink fabric bins that I purchased at a dollar store, and keep in a cupboard. Notice the label?

above my Cricut station.


Sticky back hooks (especially the 3m Command) at the end of a counter, and along the side of a cupboard make a practical place to hang up those Self-healing mats.

4. A Place for Papers. I store my papers in scrapbook paper holders ( Storage Studios by Cropper Hopper), inside my cupboards. I also write on the spine of the paper pad or outside packaging the name and color of each set of paper.

The scraps are placed inside Vinyl Job Ticket Holders and labeled. Then placed alongside the full-size sheets of papers in the same color.

5. Keeping the Vinyl in View. Now those pesky vinyl rolls are often a challenge to store as they like to roll! I took advantage of the space that is between my cupboards that normally would be covered with a false front or filler piece to have small shelves built. I then stack the rolls of Vinyl there, within reach, in view, but I am sure they won't go anywhere!


6. Cutting the clutter around The Cuttlebug™. Creating with the Cuttlebug™ is a lot of fun, but darn how to store all those Cut and Emboss Diessteel dies, Embossing folders, and the mats? Again I use the drawers I have along with some clear bins and colorful cardboard photo boxes.


I keep parts of the Embossing Folders packaging to make a holder and place to organize each folder.

7. Magnetic sheets for Cuttlebug® Dies storage. In order to keep all the different steel dies that can come in a set, I find it safer to keep them together by sticking them onto magnetic sheets which are labeled and inserted into a plastic sleeve. (Video soon)

8. What about those Cricut® Blades, and housing, etc. Ahh, the more I use my Cricut Maker™, the more blades, and housings I want. To me, this has been the most challenging of all the Cricut tools to organize. My latest system consists of small plastic storage tubs from the dollar store, a wire basket, more labels, and my trusty pegboard!


See the video here.

10. Cricut® Bags and Totes for on the go creating or at home storage. These totes are not only beautiful but they are so practical and makes traveling to and from events or vacations a breeze.

Use these totes for storage at home especially if your space is limited and you need to store your supplies once your making session is done. Look stylish with these classic looking totes too wherever you go!
Stay Crafty!
POST DISCLAIMER
This is a sponsored conversation written by me on behalf of Cricut. The opinions and text are all mine.
READER COMMENT DISCLAIMER
Comments submitted may be displayed on other websites owned by the sponsoring brand.

This is a sponsored conversation written by me on behalf of Cricut. The opinions and text are all mine.

No comments:
Post a Comment